We do have a remote colleague at work that is usually present via a permanent video chat. The video is running on a notebook sitting on a table in our office. This approach works pretty well while we are in the room, but has pretty obvious limitations when the colleague wants to move somewhere. To gift him some more abilities, I decided to build a cheapskate telepresence robot. Commercial robots come in around 1000€ (without the videoconferencing hardware) and lack the DIY charm. My version costs just about 100€ without the video gear.
I started off by ordering the essential hardware required. My biggest concerns were around the battery and motors. I ordered most parts from the Malaysian maker-site cytron.io . Cytron rebrands a line of geared motors, which fitted perfectly to my plans. From Cytron, I went with the following components:
- 12V 200RPM 2kgfcm Brushed DC Geared Motor
- 3Amp 4V-16V DC Motor Driver (2 Channels)
- Plastic Wheel for SPG30/SPG50 (80mm)
- DC Geared Motor Bracket (SPG30/SPG50)
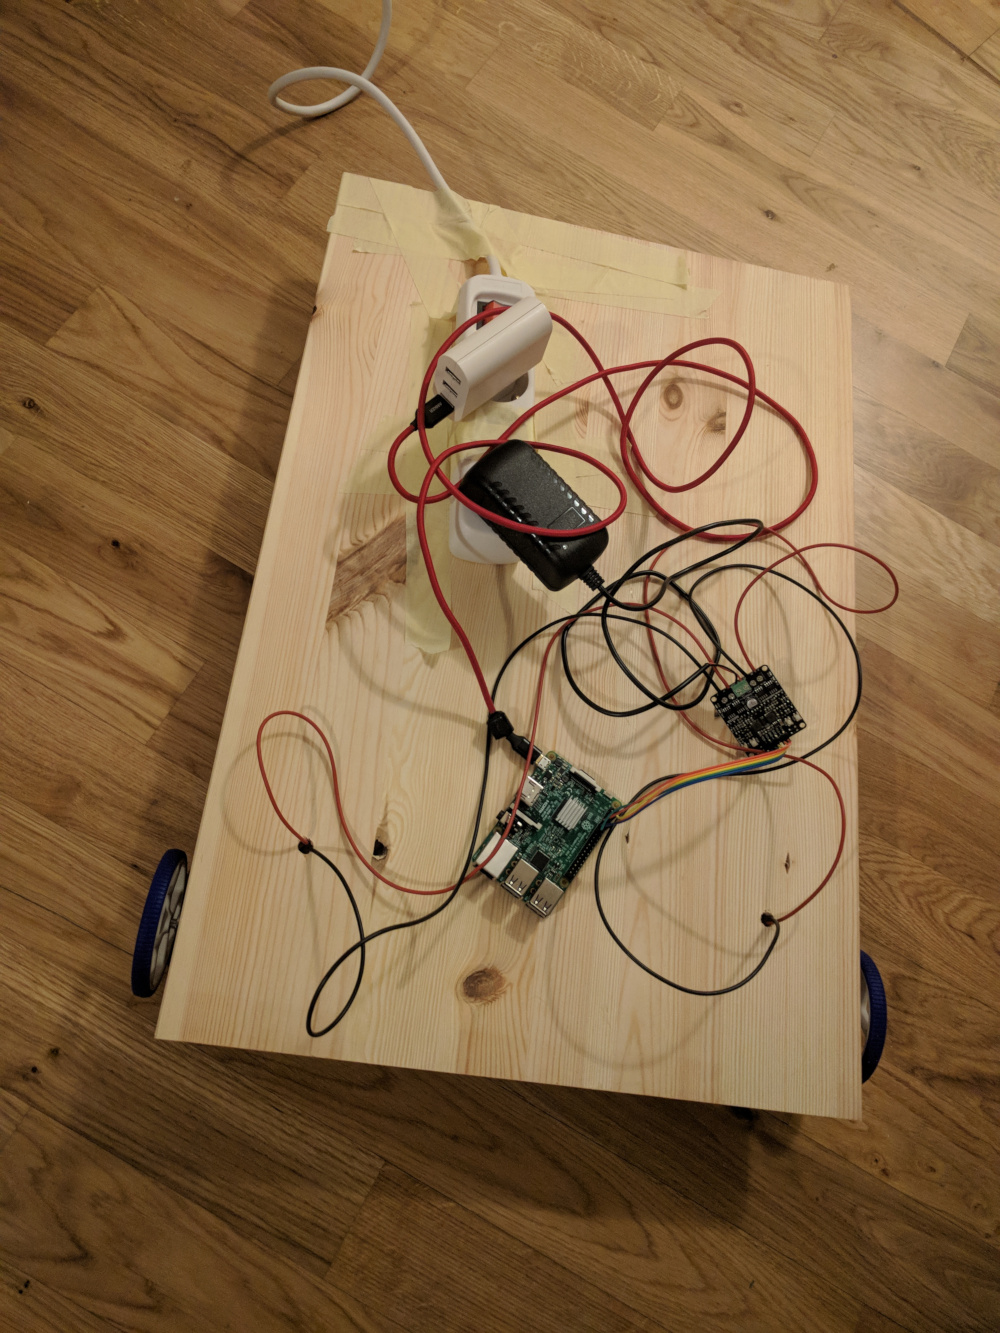
These components came in at around 40€. Together with the 19% import tax I ended up paying 50€. To control the electronics I went for a Raspberry Pi 3 that was lying around from another project. A Raspberry Pi Zero W for around 10€ would do so as well. As a battery was still missing, a 12V power supply provided the required juice for the first tests. Getting the motors to turn was not too hard using the Raspberry’s GPIO Python library. The motors could quickly be mounted on a plank using the ordered brackets. For the back wheels I used office-chair rolls for about 2€ from the local hardware store.
Next up I coded the remote control script. It leverages UDP to send two values (power and direction) to the Raspberry Pi. For input, I leveraged an XBOX 360 controller and the xbox360controller Python library. To convert the speed value (taken from the right trigger) and the direction value (taken from one of the analog sticks) into smooth power inputs for both motors I utilize a trick: While the curve-outer motor receives the full speed value in power, the inner one is set to the speed multiplied with the value from an interpolated array file. The array looks like this:
[
	[1, 0.8, 0.6, 0.4, 0.2, 0]
	[1, 0.8, 0.6, 0.4, 0.2, 0]
	[1, 0.8, 0.6, 0.4, 0.2, 0]
	[1, 0.8, 0.6, 0.4, 0.2, 0]
	[1, 0.8, 0.6, 0.4, 0.2, 0]
]
Using PIL, the “image” is interpolated to an 1000x1000 array linearly. The first (y) axis of the array is the speed input and the second (x) axis of the array is the applied steering. Using this method, it is easy to manually define non-linear steering behavior. For example, at full throttle the steering input should probably be less sharp. To achieve this, the last row of the array can simply be set to something like [1, 0.9, 0.8, 0.7, 0.6, 0.5]. Now, even with fill sideways stick movement, the curve-inner motor still receives 50% of the power of the curve-outer motor.
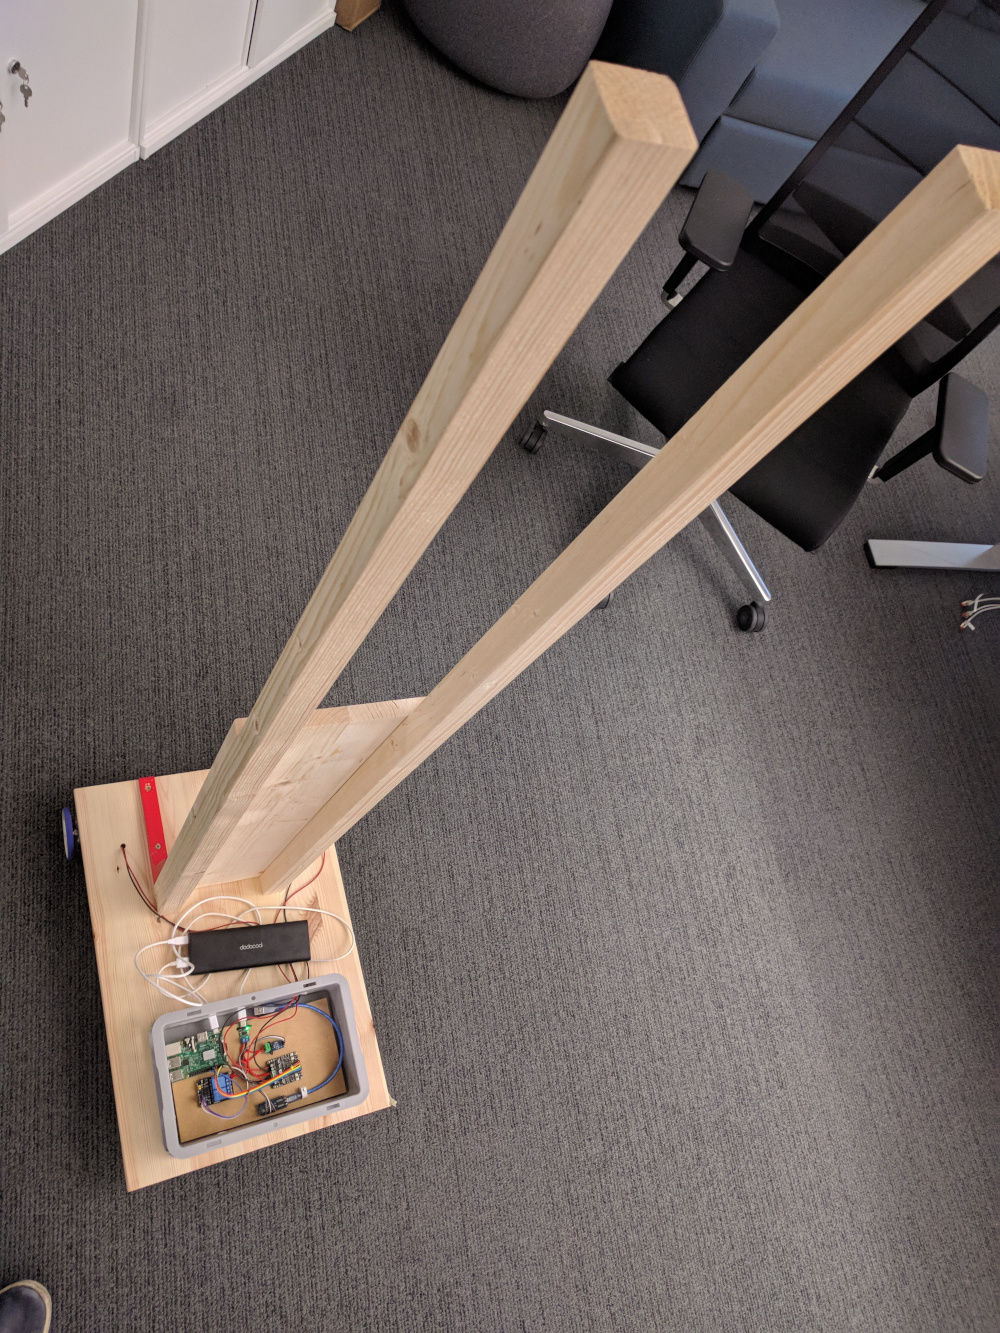
To power the robot, I decided to use a power bank with USB-C Power Delivery. This allows to simply charge the powerbank at any USB port, and the whole thing should be safer than the RC-standard LiPo packs. If the robot might be discarded, its also still be nice to have a beefy powerbank. The cheapest one I could find that features a 12V PD output was the dodocool DP13 and cost me about 35€ with a 10€ Amazon voucher. It seems not to be available anymore, but any similar device will to the deal. To extract the 12V from the powerbank, ebay has the neat ZY12PDN modules for about 3€. They simply plug into the USB-C port and extract any available voltage from 5V to 20V and up to 100W. So I mounted all the hardware into a box, and the box on the plank.

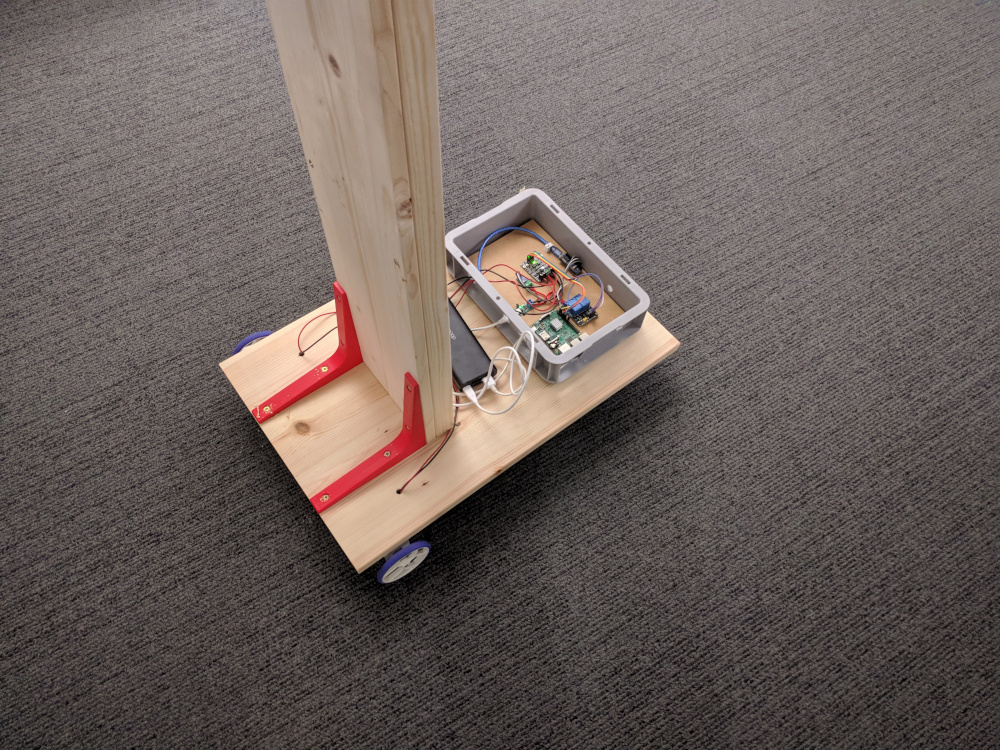
By sticking a phone with video chat software on the top (I was using whereby.com here), a remote user is now able to drive the robot as long as the remote user can reach the RasPi via UDP. The whole construction is around 1,6m tall, which makes it easy to keep an overview while driving and talking to people. This works surprisingly well. The maximum speed of around 2.5kph at 200RPM is absolutely enough for indoors usage.
Next up, I am building a mount for a larger tablet to stick on top of the robot. The tablet could also trigger the already mounted relays to only power the motors if somebody wants to drive around. This should also limit battery pack usage. The total cost of this project, including the wood and screws, is around 100€ until now.