HDMI capture cards have always been quite expensive. Cards from renowned providers like Blackmagic cost around 150€. Cards from AliExpress and similar sellers still had some caveat. They either limited the capture to 720p or 30Hz or used some internal analog conversion, which killed the image quality. These problems seem to have vanished over the last few years, and the cards available on AliExpress and eBay now promise 1080p capture with 60fps and high image quality - so I gave it a try. The card I purchased promises 60fps 1080p capture, a USB 3.0 interface, and compatibility with Linux for 15,99€. Other cards are a little cheaper but only promise 1080p@30fps.
Getting to know the card
The card identifies as a “MACROSILICON USB Video” (idVendor=534d, idProduct=2109, bcdDevice=21.00) and is compatible with uvcvideo. Therefore, it works out of the box on my Fedora 32 machine. Opening the video device with vlc was unpleasant though: The framerate was very low, and the colors were odd. I used v4l2-ctl to check out available framrates and formats:
v4l2-ctl -d /dev/video4 --list-formats-ext
ioctl: VIDIOC_ENUM_FMT
	Type: Video Capture

	[0]: 'MJPG' (Motion-JPEG, compressed)
		Size: Discrete 1920x1080
			Interval: Discrete 0.033s (30.000 fps)
			Interval: Discrete 0.040s (25.000 fps)
			Interval: Discrete 0.050s (20.000 fps)
			Interval: Discrete 0.100s (10.000 fps)
			Interval: Discrete 0.200s (5.000 fps)
		[...]
	[1]: 'YUYV' (YUYV 4:2:2)
		Size: Discrete 1920x1080
			Interval: Discrete 0.200s (5.000 fps)
		[...]
This result means that the card can only capture FullHD in 30fps and do that only with MJPG compression. Uncompressed (YUYV), only 5fps for FullHD are possible. The maximum compressed (MJPG) capture modes are:
- 1920x1080 30fps
- 1600x1200 30fps
- 1360x768 30fps
- 1280x1024 30fps
- 1280x960 50fps
- 1280x720 60fps
- 1024x768 60fps
- 800x600 60fps
- 720x576 60fps
- 720x480 60fps
- 640x480 60fps
The maximum uncompressed (YUYV) capture modes are:
- 1920x1080 5fps
- 1600x1200 5fps
- 1360x768 8fps
- 1280x1024 8fps
- 1280x960 8fps
- 1280x720 10fps
- 1024x768 10fps
- 800x600 20fps
- 720x576 25fps
- 720x480 30fps
- 640x480 30fps
All modes are progressive (not interlaced). To start vlc with the high-framerate MJPG stream, use vlc v4l2:///dev/video4:fps=30:chroma=mjpg.
MJPG compression quality
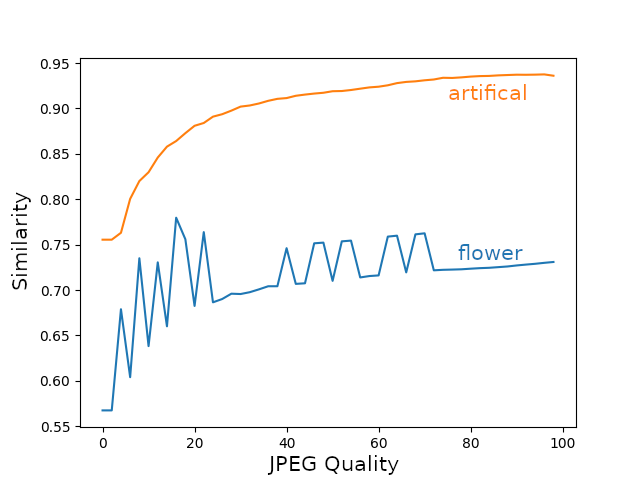
With the correct options, the video was more fluent but still looked a bit off. I suspected this was due to a low MJPG quality setting on the card itself. Because of the limited framerate in YUYV, only the MJPG format can be sensibly used for video capture. To test the compression quality in MJPG, I looped a test image through the card and captured the MJPG result. After that, I compared the looped image with the original JPEG, saved with different quality settings. The pictures I used are the 8bit-versions of “artifical” and “flower_foveon” from http://imagecompression.info/test_images/. The similarity was measured with the “compare_ssim”-method from skimage.
The results showed that the capture card MJPG quality is likely about 90. The graph looked very odd, though.
from skimage.measure import compare_ssim
import matplotlib.pyplot as plt
import cv2

original = cv2.imread("artifical.png")
to_compare = cv2.imread("comparison_mjpg_artificial.png")

qualities = []
scores = []
for quality in range(0, 100, 2):
	print(f"Testing Quality {quality}")
	cv2.imwrite("quality.jpg", original, [cv2.IMWRITE_JPEG_QUALITY, quality]) # Write a image to compare to with the desired quality
	original_compressed = cv2.imread("quality.jpg")

	score = compare_ssim(original_compressed, to_compare, multichannel=True)
	print(f"Score {score}")
	qualities.append(quality)
	scores.append(score)

plt.plot(qualities, scores)
To validate my method, I also captured YUYV stills. These stills should have a very high similarity score since the capture is not compressed and should not expose artifacts. However, the values suggested a much lower similarity than expected as well.
But where do the differences originate? The images that were captured with the card had more contrast than the originals. I suspected that the card treats the input images with the wrong color space. This also explained the odd quality graphs.
Optimizing the color settings
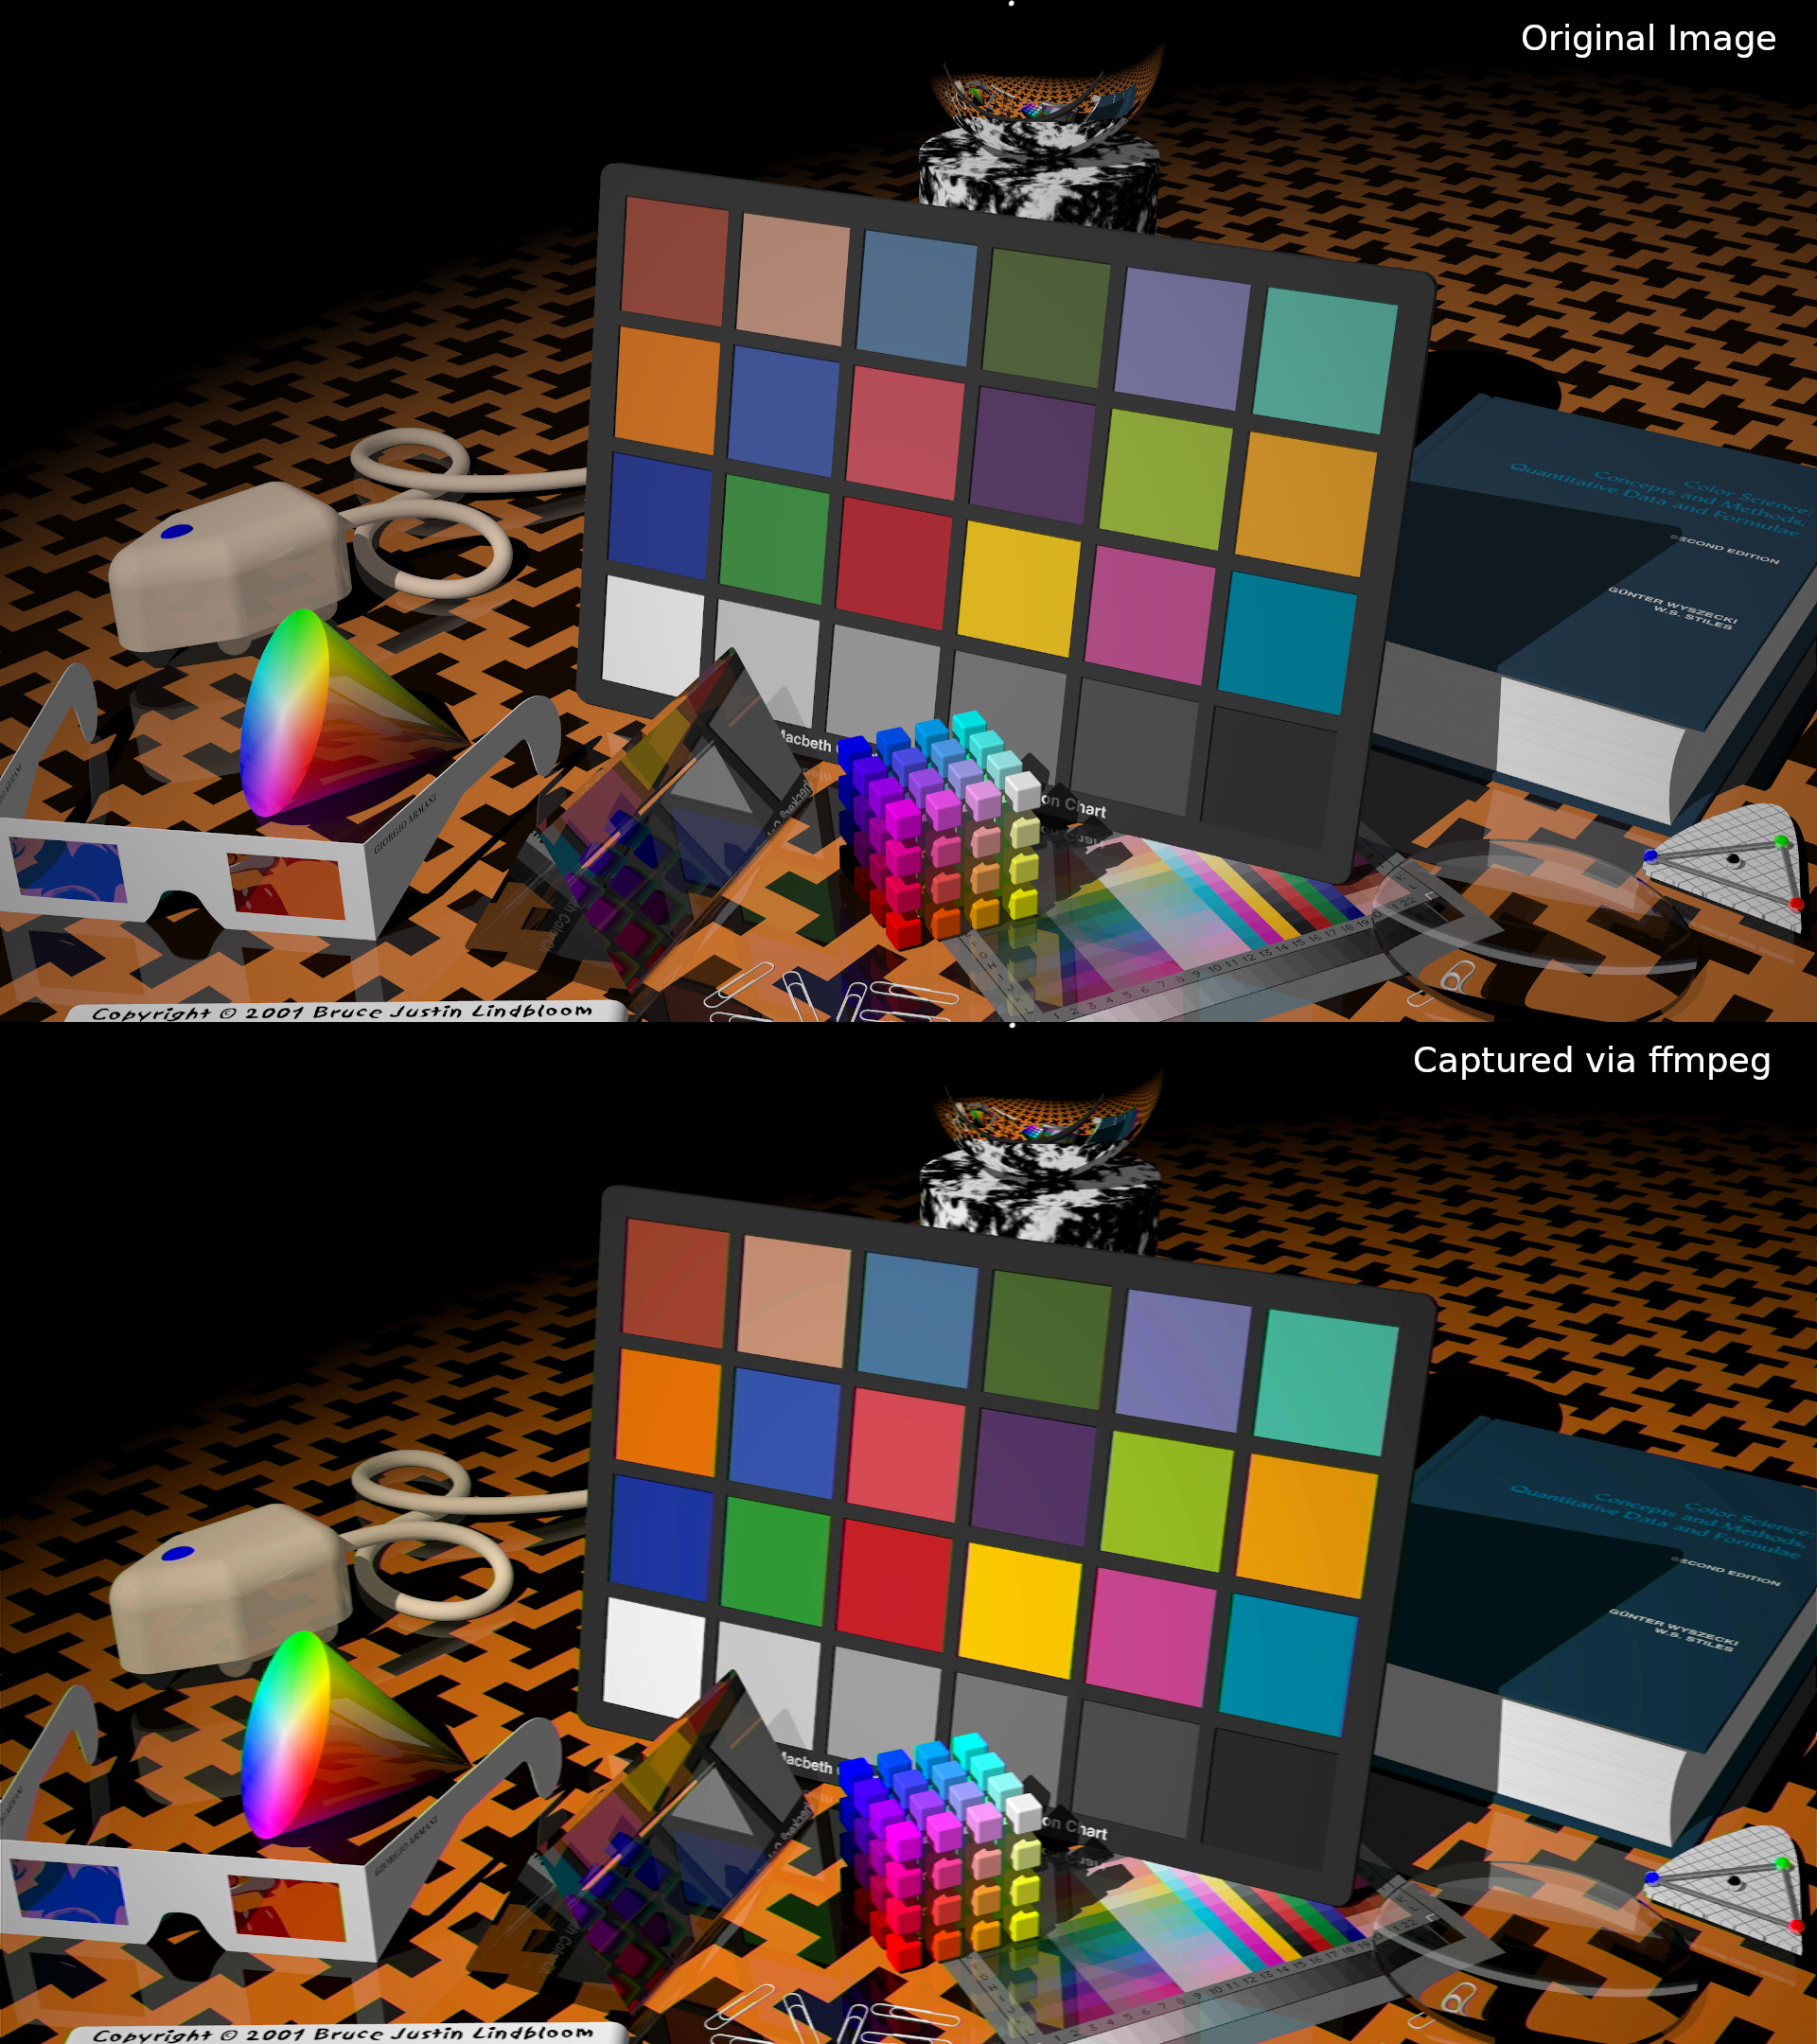
While searching for an option to correct the issue, I noticed, that the standard device settings were rather different from what I expected them to be:
v4l2-ctl -d /dev/video4 --list-ctrls
 brightness 0x00980900 (int)    : min=-128 max=127 step=1 default=-11 value=-11
   contrast 0x00980901 (int)    : min=0 max=255 step=1 default=148 value=148
 saturation 0x00980902 (int)    : min=0 max=255 step=1 default=180 value=180
        hue 0x00980903 (int)    : min=-128 max=127 step=1 default=0 value=0
So I set all the values to their reasonable middles and tested the result again.
v4l2-ctl -d /dev/video4 --set-ctrl=brightness=0
v4l2-ctl -d /dev/video4 --set-ctrl=contrast=127
v4l2-ctl -d /dev/video4 --set-ctrl=saturation=127
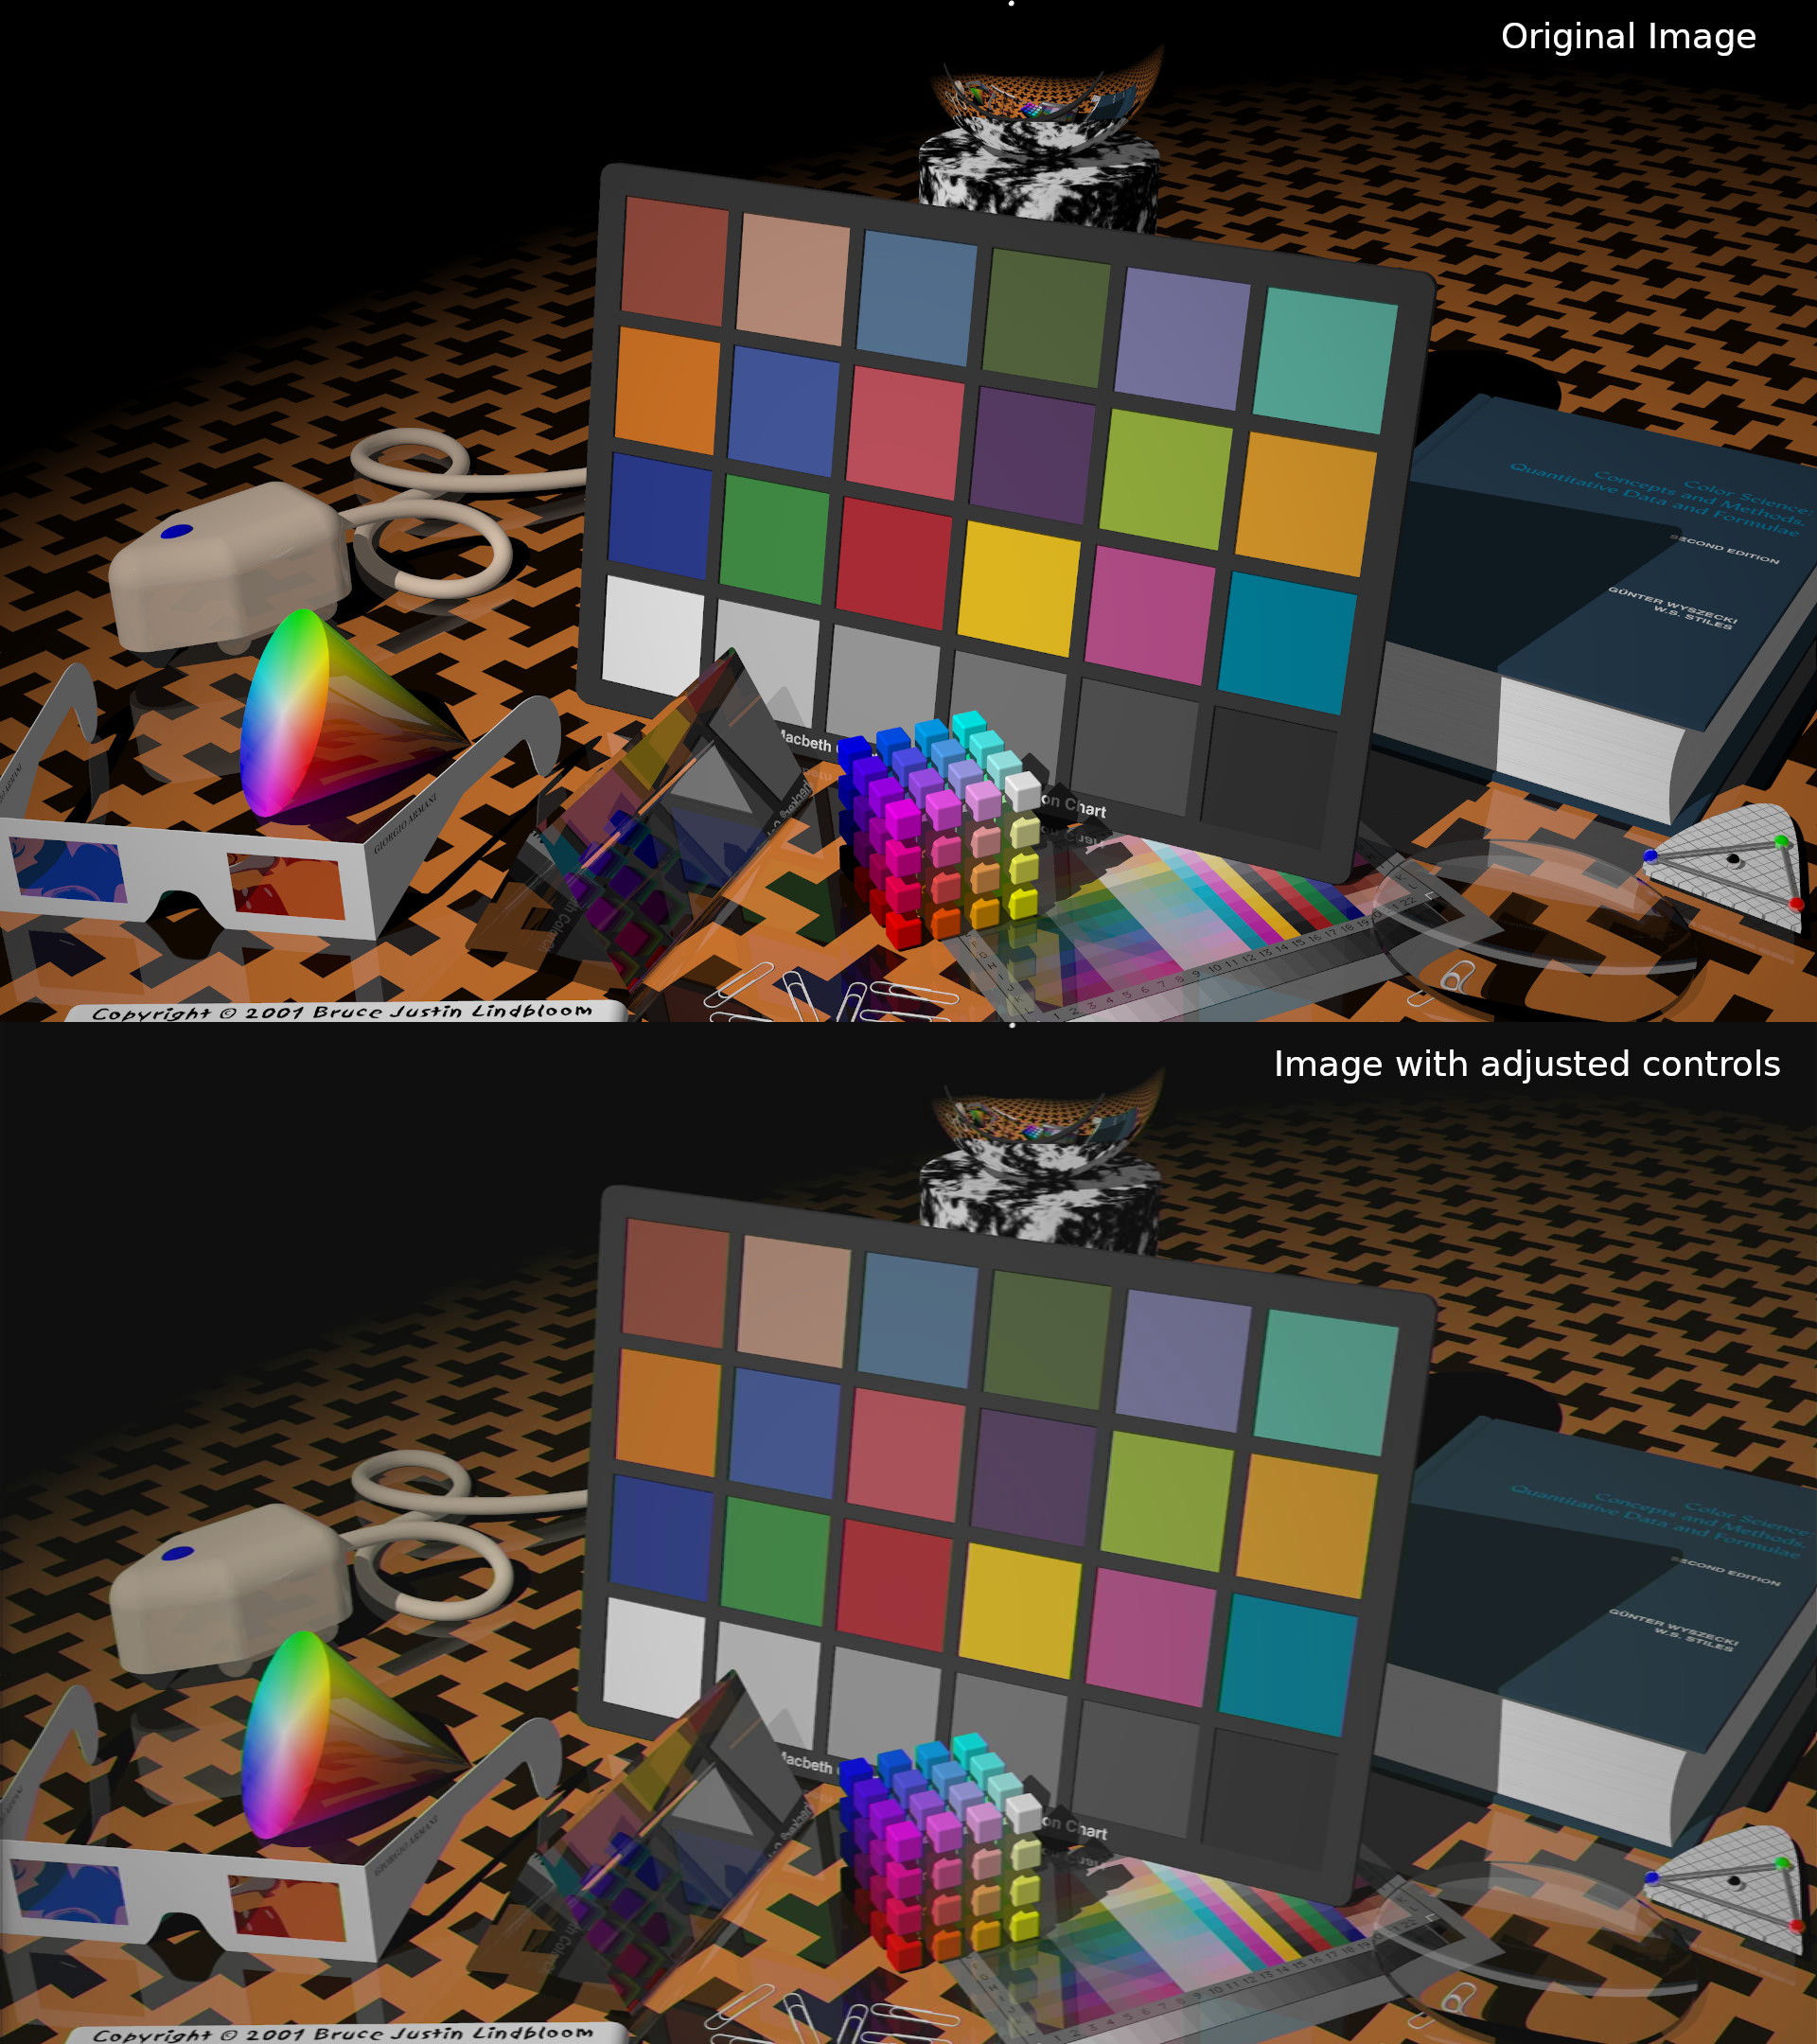
Since the changes reduced the oversaturated color errors, the next task was to find the settings that would make the output image similar to the input. For this task, I wrote another script that iterates configuration combinations and tries to find the best match between the input and output. The card takes two to seven seconds to adjust the image settings, which limits the possible iterations. Therefore, I went for the monte carlo method. The original image was displayed in full screen on the card, and the script compared the captured image with the original every few seconds to find the best combination.
from skimage.measure import compare_ssim
import cv2
import random, os, time

original = cv2.imread("artifical.png")

# Initialize video capture and set correct shape
combinations = []
while True:
	brightness = random.randint(-30, 30)
	contrast = random.randint(100, 160)
	saturation = random.randint(100, 160)
	hue = random.randint(-30, 30)

	print(f"Testing brightness:{brightness} contrast:{contrast} saturation:{saturation} hue:{hue}")
	os.system(f"v4l2-ctl -d /dev/video4 --set-ctrl=brightness={brightness}")
	os.system(f"v4l2-ctl -d /dev/video4 --set-ctrl=contrast={contrast}")
	os.system(f"v4l2-ctl -d /dev/video4 --set-ctrl=saturation={saturation}")
	os.system(f"v4l2-ctl -d /dev/video4 --set-ctrl=hue={hue}")
	time.sleep(10)  # Wait for the capture card to adopt

	# Open and close the video device every time to clear the buffer
	cap = cv2.VideoCapture(4)
	cap.set(cv2.CAP_PROP_FOURCC , cv2.VideoWriter_fourcc(*"MJPG"))
	cap.set(3, 1920)
	cap.set(4, 1080)
	ret, captured = cap.read()
	cap.release()

	score = compare_ssim(original, captured, multichannel=True)
	combinations.append([brightness, contrast, saturation, hue, score])
	for r in sorted(combinations, key=lambda x: x[4], reverse=True)[:10]:
		print(r)
I ran the test with both test images for about 30 minutes each.
Results for “artifical”:
- [-17, 130, 148, 8, 0.8901]
- [-16, 131, 108, 13, 0.8897]
- [-23, 160, 159, 16, 0.8799]
- [-21, 134, 108, 10, 0.8736]
Results for “flower_foveon”:
- [-12, 131, 148, 2, 0.9432]
- [-8, 120, 145, 14, 0.9280]
- [-2, 101, 148, 4, 0.9226]
- [-5, 103, 132, 0, 0.9203]
Likely, truth lies somewhere between the values brightness -23 to -2, contrast 101 to 160, saturation 108 to 159 and hue 0 to 16. Depending on the picture content, the perfect settings are a bit different. To find the best compromise, I cross-tested the best four settings for both images:
- [-17, 130, 148, 8] Flower: 0.9250, Artifical: 0.8901, Total: 1.8151
- [-16, 131, 108, 13] Flower: 0.8498, Artifical: 0.8897, Total: 1.7395
- [-23, 160, 159, 16] Flower: 0.9067, Artifical: 0.8799, Total: 1.7866
- [-21, 134, 108, 10] Flower: 0.8384, Artifical: 0.8736, Total: 1.7120
- [-12, 131, 148, 2] Flower: 0.9432, Artifical: 0.7771, Total: 1.7203
- [-8, 120, 145, 14] Flower: 0.9280, Artifical: 0.7160, Total: 1.6440
- [-2, 101, 148, 4] Flower: 0.9226, Artifical: 0.6814, Total: 1.6040
- [-5, 103, 132, 0] Flower: 0.9203, Artifical: 0.7040, Total: 1.6243
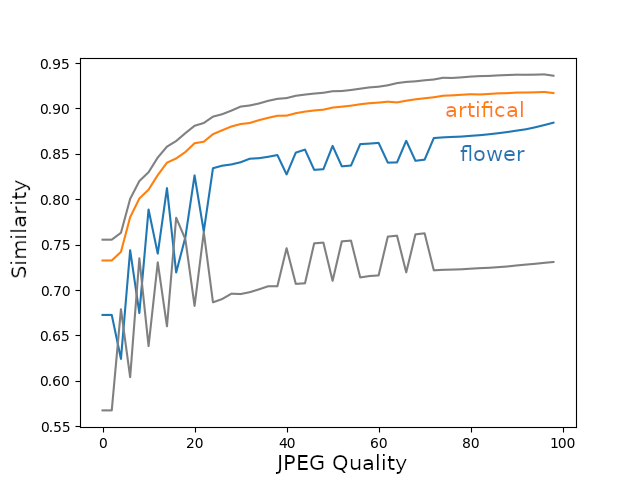
The optimizations for YUYV came out different at:
- [-2, 145, 121, -5] Flower: 0.8636, Artifical: 0.9181, Total: 1.7817
- [-4, 137, 146, 3] Flower: 0.9456, Artifical: 0.9136, Total: 1.8592
- [-1, 142, 135, -11] Flower: 0.8576, Artifical: 0.9133, Total: 1.7709
- [-1, 122, 109, -4] Flower: 0.8680, Artifical: 0.9127, Total: 1.7807
- [-1, 135, 146, 2] Flower: 0.9514, Artifical: 0.9277, Total: 1.8791
- [4, 124, 151, 2] Flower: 0.9509, Artifical: 0.8222, Total: 1.7731
- [5, 114, 142, 1] Flower: 0.9491, Artifical: 0.8175, Total: 1.7666
- [-3, 140, 156, -4] Flower: 0.9452, Artifical: 0.9030, Total: 1.8482
With these compromise settings, I re-ran my initial quality testing.
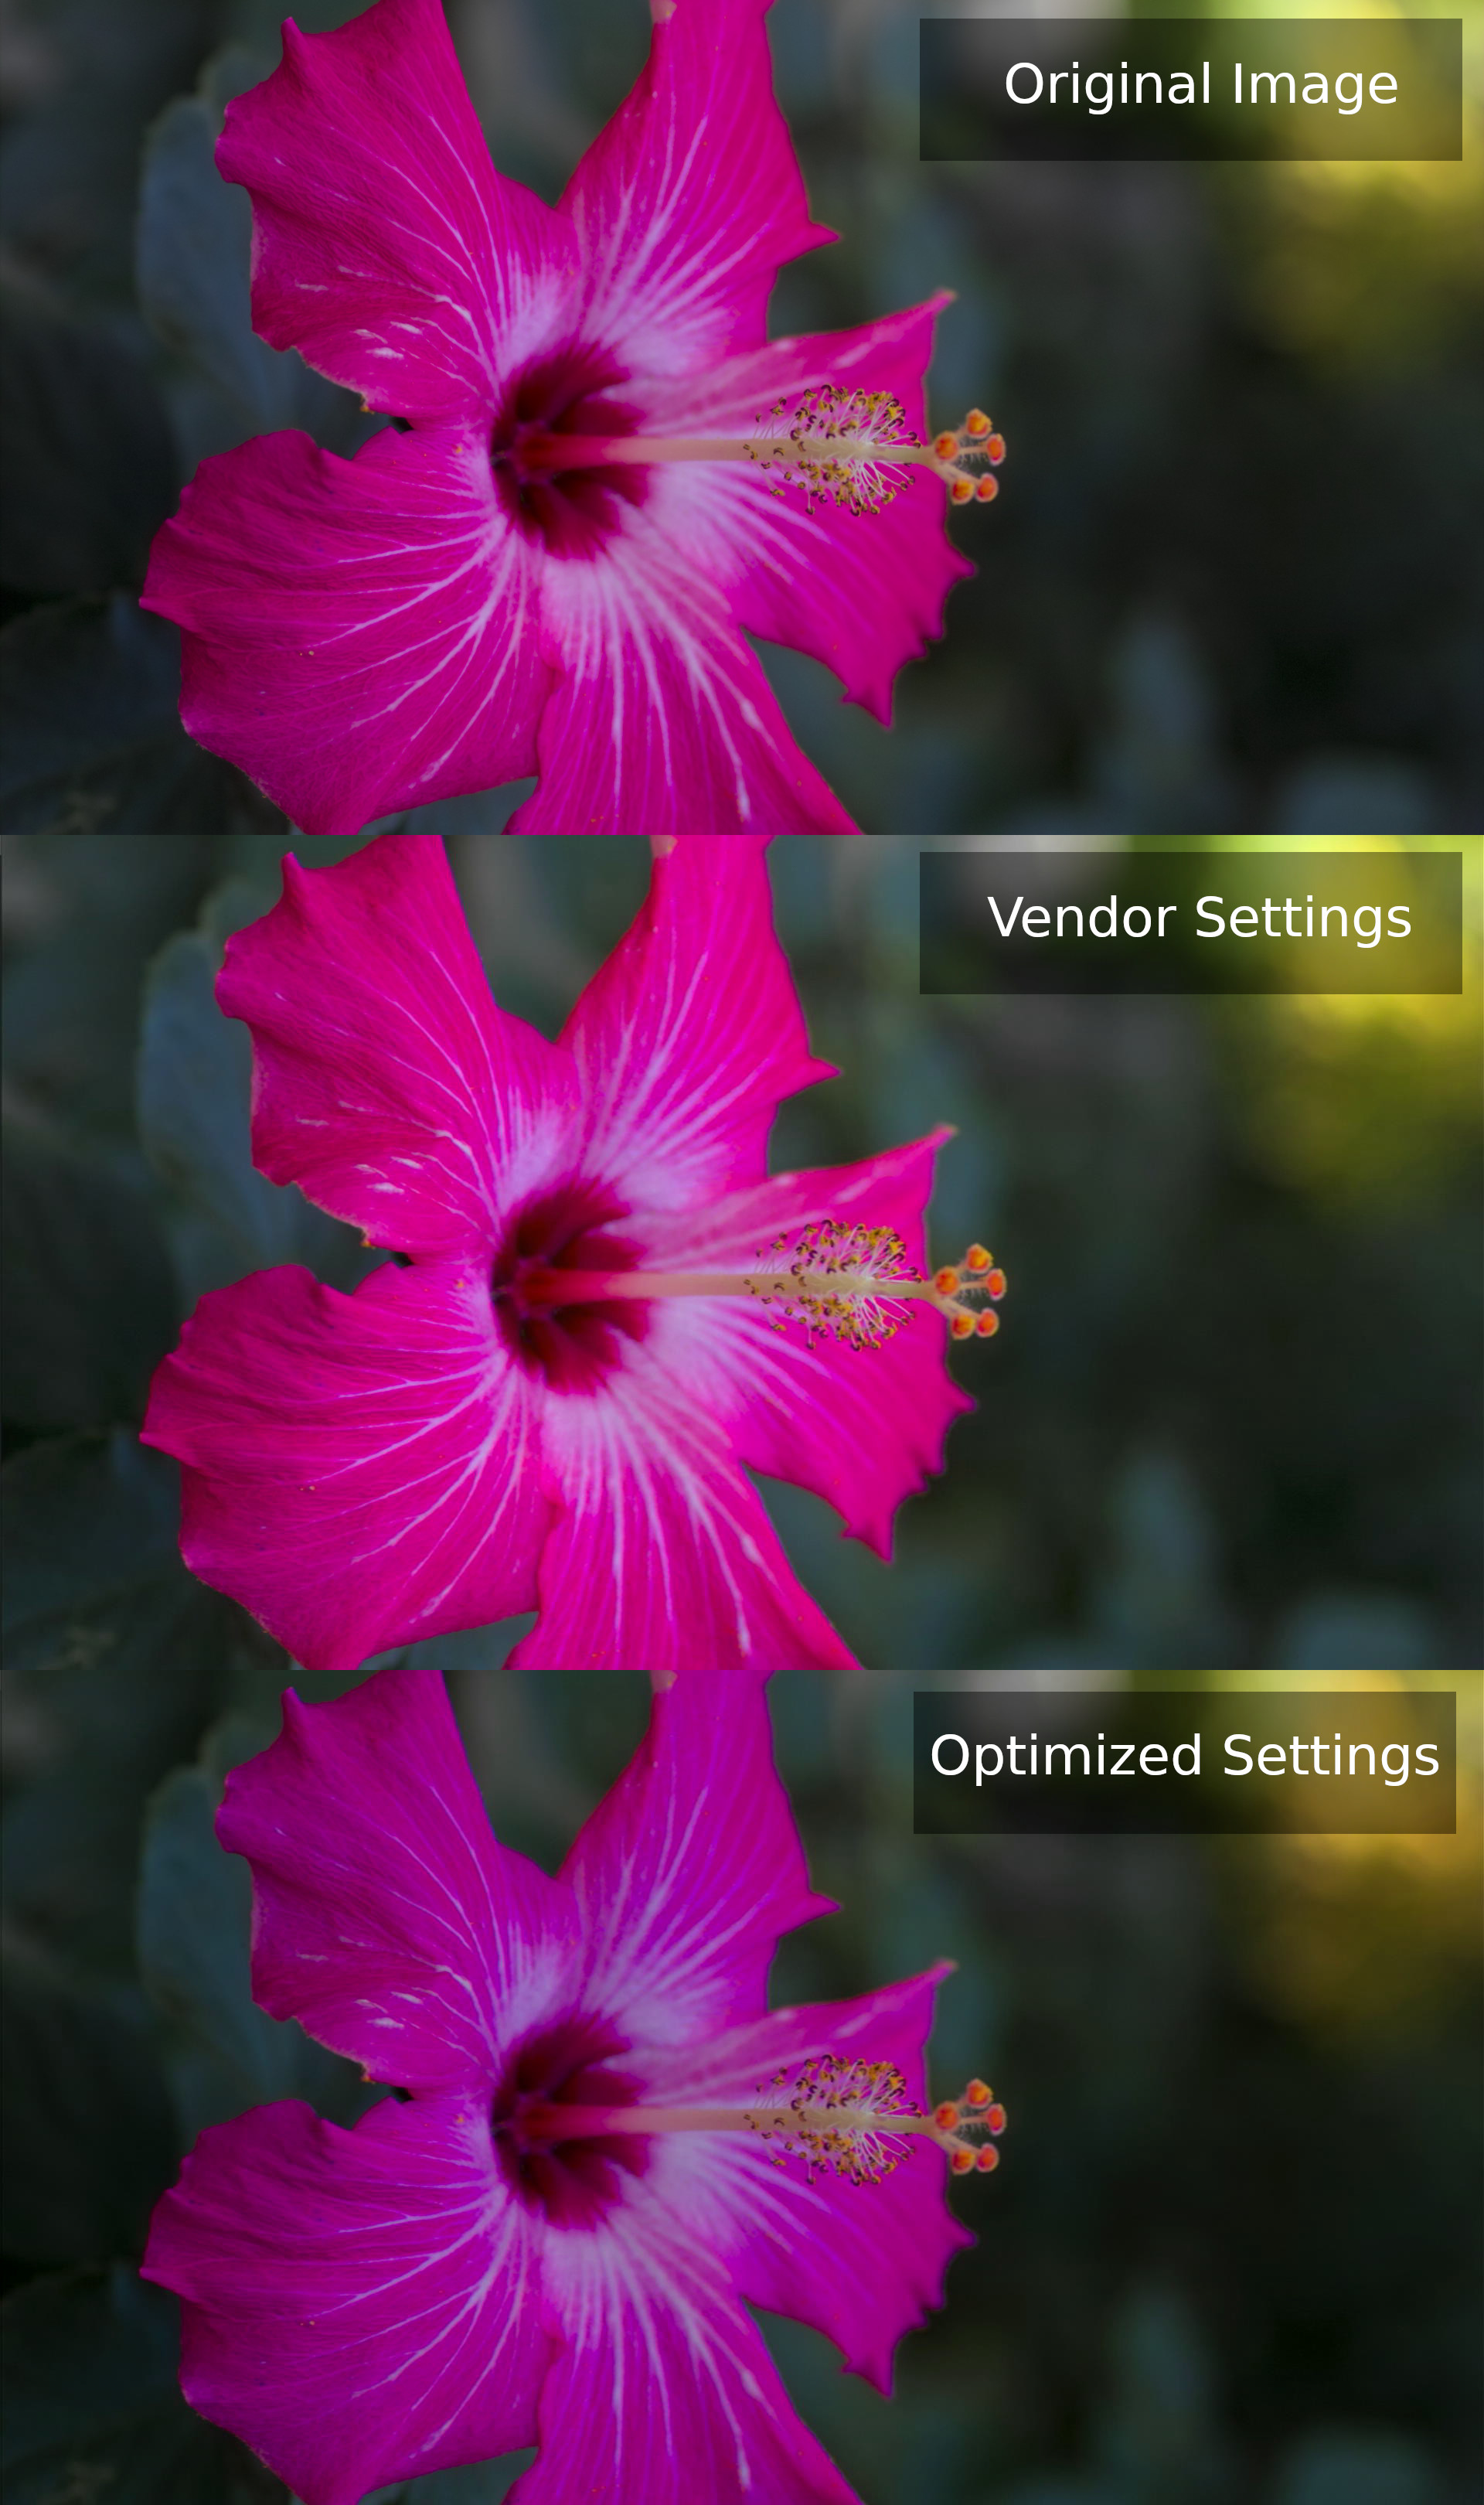
While “artifical” now had a red tint and lost some appeal, the overall score was still acceptable. In comparison, “flower_foveon” has massively improved its visual quality and score.
To make sure the optimizations improved the image quality, I ran the test against other sample images from the set.
| Test File | Original | Flat | Optimized |
|---|---|---|---|
| big_building | 0.7544 | 0.7343 | 0.7330 |
| big_tree | 0.7351 | 0.7139 | 0.7134 |
| bridge | 0.7052 | 0.6650 | 0.6784 |
| cathedral | 0.8047 | 0.7471 | 0.7938 |
| deer | 0.7695 | 0.7549 | 0.7584 |
| fireworks | 0.4947 | 0.3503 | 0.8709 |
Overall, the optimized settings performed a little worse than the original. However, in the fireworks scene, the optimized settings performed far better than the original. Visually compared, the original settings seem better than the optimized settings, though. The sample set contains a lot of dark and tinted images, which might bias the results.
All-in-all, my optimizations failed successfully. While some images show a massive improvement, the overall visual quality degraded.
A different approach
My next approach was more methodological. I used EIZO’s monitor test images , namely “Smooth color gradation” and “Monochrome gradation”, scaled them to FullHD, and re-ran my monte carlo testing for the best settings.
Results for color.png
- [-18, 141, 150, -8, 0.9080]
- [-53, 180, 161, -2, 0.9009]
- [-52, 196, 199, -8, 0.8868]
- [-5, 106, 158, -6, 0.8745]
- [-34, 180, 192, 10, 0.8648]
At this point, the card got really hot and started to smell funny 🔥.
[214618.682332] usb usb1-port6: over-current condition
The end
I opened up the case to check for signs of failed components, but the board looked nice and tidy. The opened card shows that it cannot be USB 3.0 compatible since only four wires are connected. USB 3.0 would require at least eight wires. The employed chips is a Macro Silicon MS2019 ASIC.
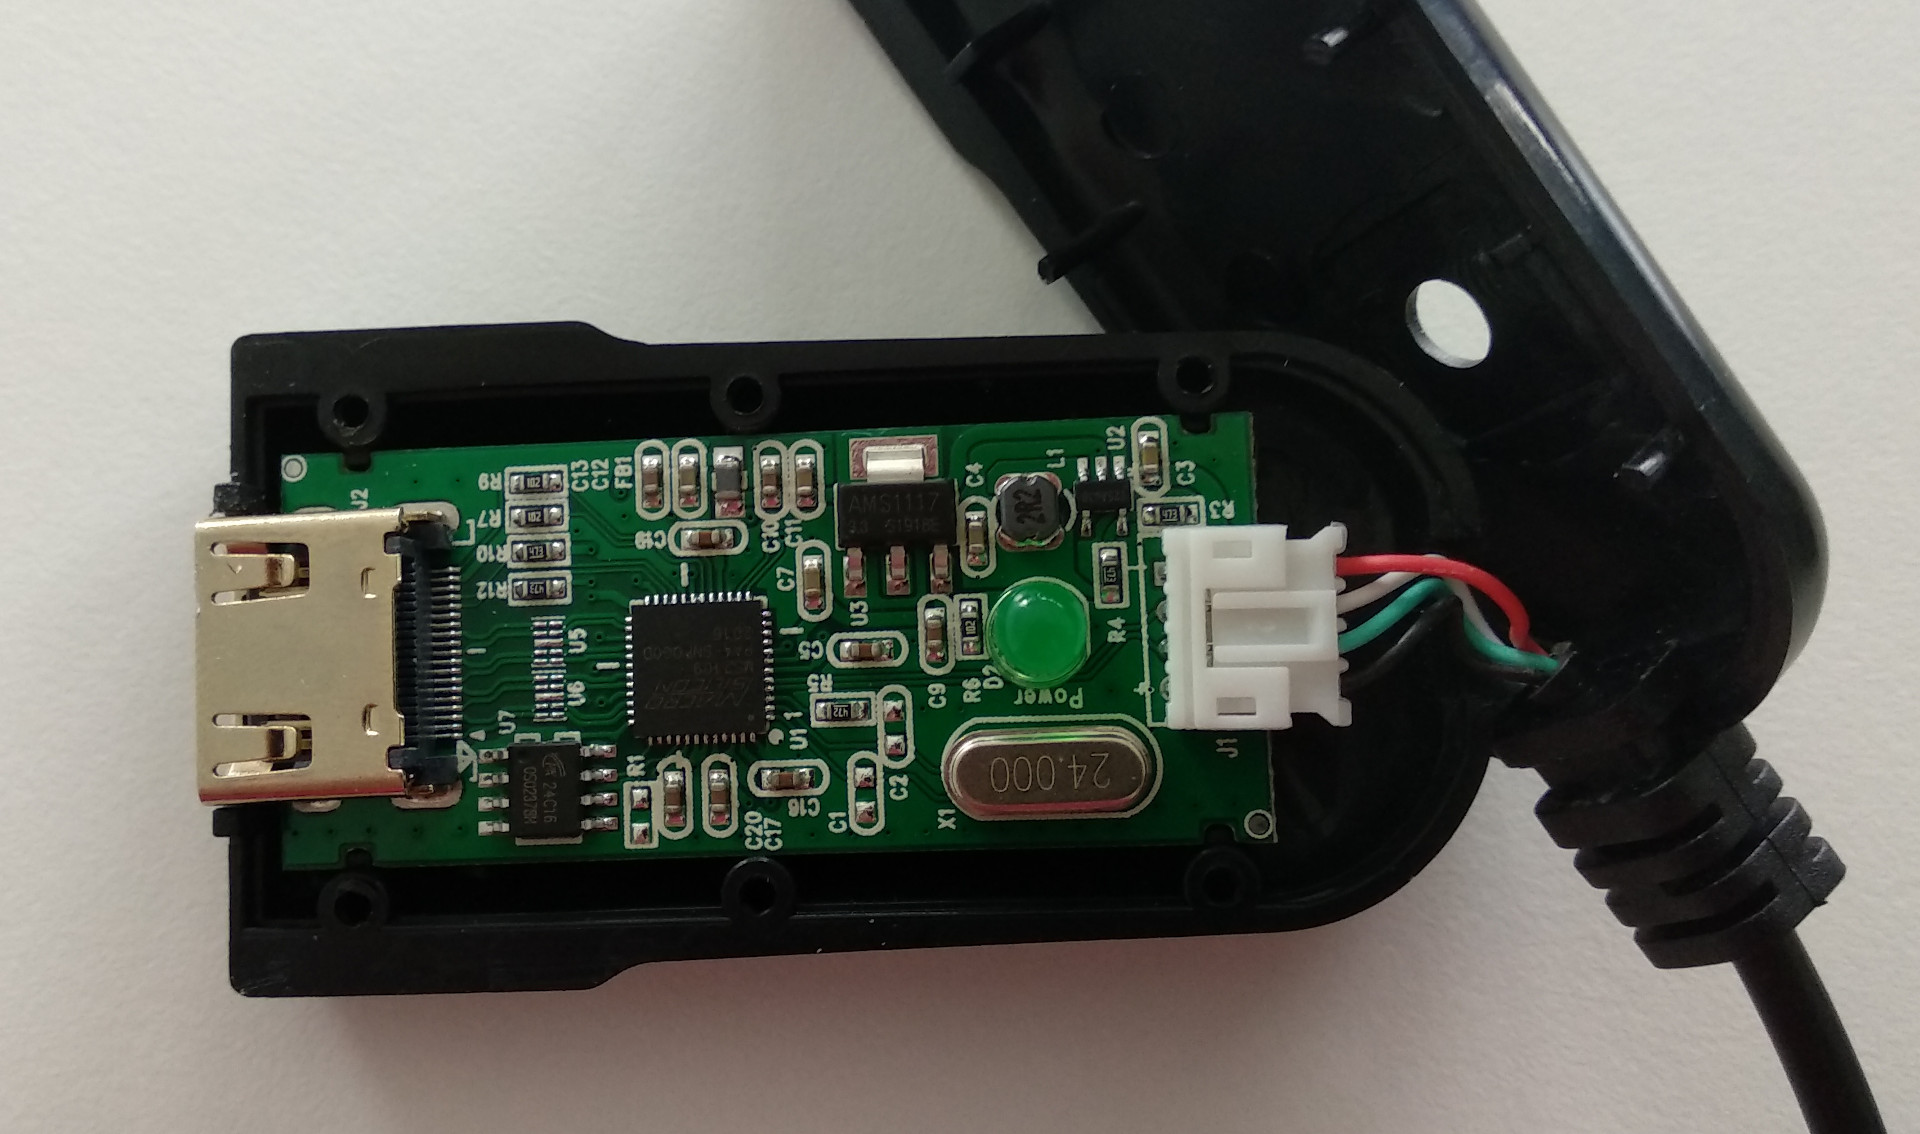
Even after it cooled down, the card was dead, and the ASIC got really hot when it was connected to a USB port. It is dead, Jim.
It might have been an error on my side, or the card did not like the looping. My card might also have had a defect in the first place. However, I would not recommend buying one of these cards and let it run unmonitored. Sadly, the broken card also prevented me from testing out the new color settings.
This is the preliminary end of my cheap USB capture journey, but I already ordered a different cheap USB card from eBay and will continue as soon as it arrives.
Update: I have received my new grabber.