During the COVID-19 outbreak, my employer thankfully decided to order 100% home office for my colleagues and me. While many things went very well, some still annoy me: 10 weeks into the crisis, many of the people I talk to still lack a proper videoconferencing setup. This lack is annoying, especially in larger conference calls. So I thought it would make sense to document my rather cheap videoconferencing setup here.
Headset
There is not too much to say here. I am using a Fnatic React, which was about 80€ on Amazon. Since I did not want to have the headset hanging on my laptop all the time, I also bought a cheap “DuKabel” USB soundcard. The headset works well well for me. It sits rather tight, which hurt my ears a little for the first two weeks. It isolates from the environment strongly, and the sound quality is quite good. A 3,5mm jack only attaches the microphone, so I could change it when I needed something better. With this headset, my audio is better than most of the people I talk to, except the podcast guys.
Camera
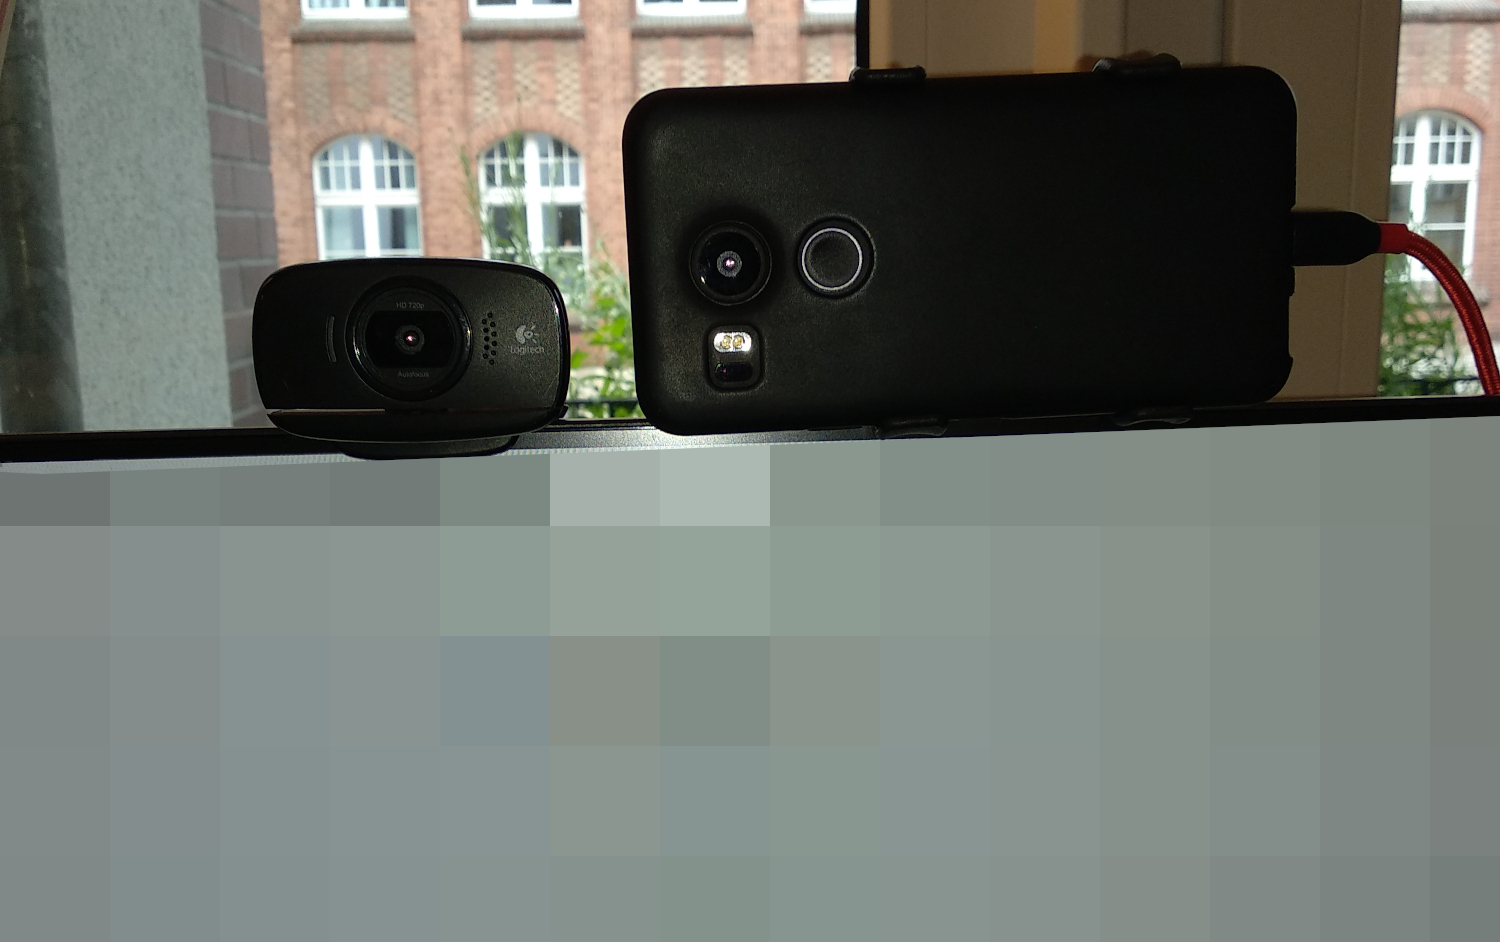
At first, I have been using a Logitech C525 because I had it lying around. The Logitech may be good enough for many use cases, but the white balance and noise levels can be quite off. Playing around with v4l2-ctl, I was able to fix some of these issues. It is included in the v4l-utils package.
# List available camera devices
v4l2-ctl --list devices
HD Webcam C525 (usb-0000:00:1a.0-1.1.3):
	/dev/video3
	/dev/video4

Integrated Camera: Integrated C (usb-0000:00:1a.0-1.6):
	/dev/video1
	/dev/video2

# List formats available for capture
v4l2-ctl -d /dev/video3 --list-formats-ext
...long list of available formats...

# List avilable controls for the camera /dev/video3
v4l2-ctl -d /dev/video3 --list-ctrls
                     brightness 0x00980900 (int)    : min=0 max=255 step=1 default=128 value=128
                       contrast 0x00980901 (int)    : min=0 max=255 step=1 default=32 value=32
                     saturation 0x00980902 (int)    : min=0 max=255 step=1 default=32 value=32
 white_balance_temperature_auto 0x0098090c (bool)   : default=1 value=1
                           gain 0x00980913 (int)    : min=0 max=255 step=1 default=64 value=64
           power_line_frequency 0x00980918 (menu)   : min=0 max=2 default=2 value=2
      white_balance_temperature 0x0098091a (int)    : min=2800 max=6500 step=1 default=5500 value=5500 flags=inactive
                      sharpness 0x0098091b (int)    : min=0 max=255 step=1 default=22 value=22
         backlight_compensation 0x0098091c (int)    : min=0 max=1 step=1 default=1 value=1
                  exposure_auto 0x009a0901 (menu)   : min=0 max=3 default=3 value=3
              exposure_absolute 0x009a0902 (int)    : min=3 max=2047 step=1 default=166 value=166 flags=inactive
         exposure_auto_priority 0x009a0903 (bool)   : default=0 value=1
                   pan_absolute 0x009a0908 (int)    : min=-36000 max=36000 step=3600 default=0 value=0
                  tilt_absolute 0x009a0909 (int)    : min=-36000 max=36000 step=3600 default=0 value=0
                 focus_absolute 0x009a090a (int)    : min=0 max=255 step=5 default=60 value=60 flags=inactive
                     focus_auto 0x009a090c (bool)   : default=1 value=1
                  zoom_absolute 0x009a090d (int)    : min=1 max=5 step=1 default=1 value=1

# Get a lot more information about the device
v4l2-ctl -d /dev/video3 --all
...
                           gain 0x00980913 (int)    : min=0 max=255 step=1 default=64 value=64
           power_line_frequency 0x00980918 (menu)   : min=0 max=2 default=2 value=2
				0: Disabled
				1: 50 Hz
				2: 60 Hz
      white_balance_temperature 0x0098091a (int)    : min=2800 max=6500 step=1 default=5500 value=5500
                      sharpness 0x0098091b (int)    : min=0 max=255 step=1 default=22 value=22
...

# Set a control
v4l2-ctl --device /dev/video3 --set-ctrl white_balance_temperature_auto=0
All this was nice, but the video quality was still not great. So I went for droidcam, which allows me to use any Android smartphone as a webcam. The smartphone I use is a Nexus 5x. The camera is by far better than the Logitech C525! The colors are much more beautiful, and the images are a lot sharper. The droidcam page has quite an extensive setup documentation so that I won’t recap that here. Just keep in mind that your smartphone needs to have PTP USB mode enabled, so USB debugging works properly. There is also an option in the developer settings of Android to enable PTP mode every time the smartphone is plugged in.
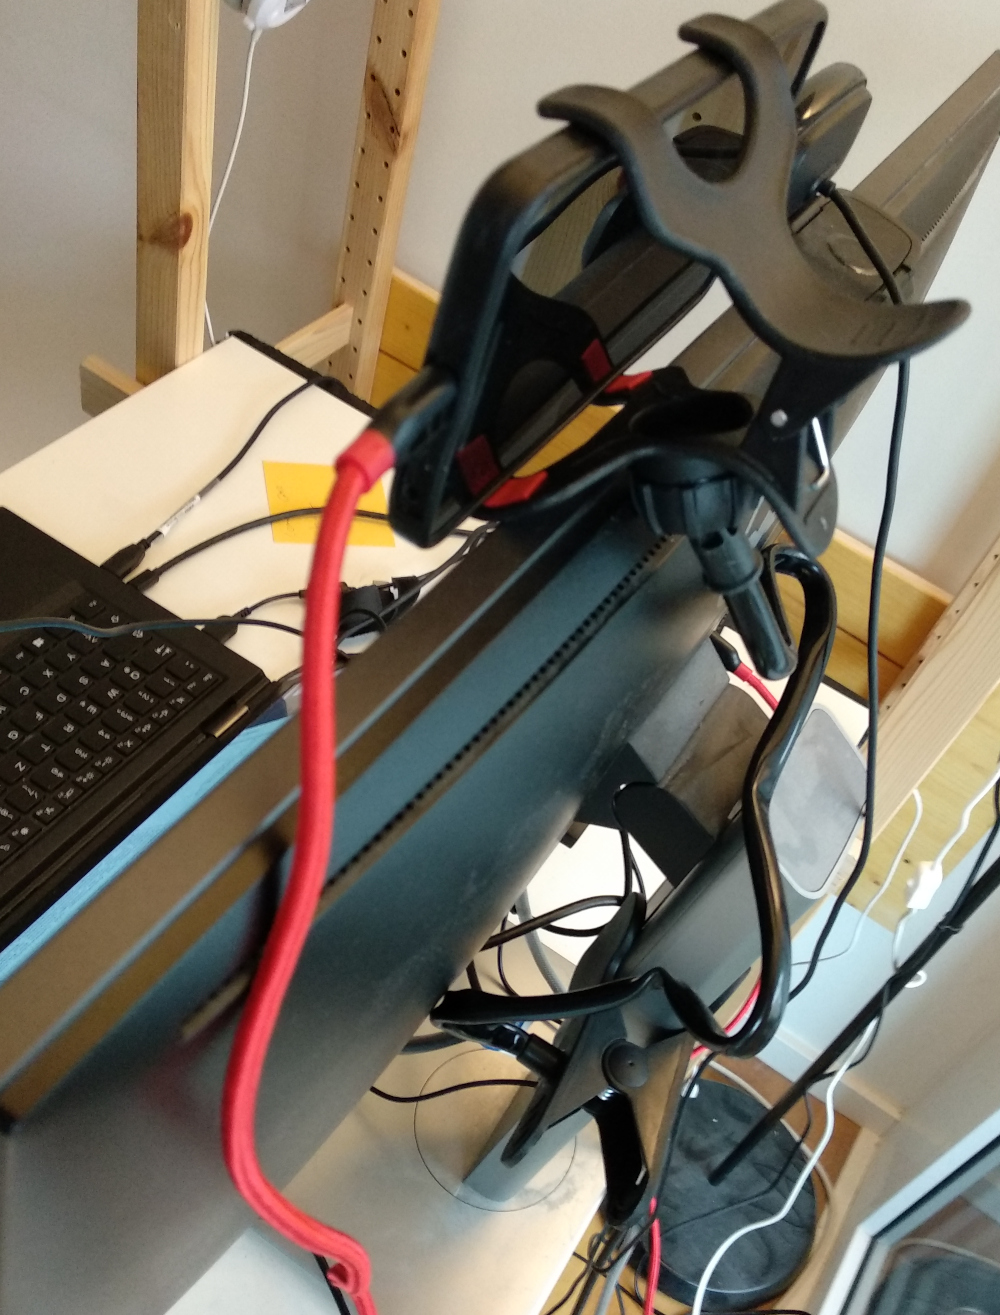
To mount the smartphone, I used the cheapest clamp I could find on Amazon. It is a Demarkt Bett Handyhalterung Tisch Halterung für Handy for 3,99€. It took around three weeks to arrive but serves its job well since. The arm is very long (at least 40cm!), and rather rigid, so the placement is flexible.
Conclusion
All in all, I am delighted with my setup. Even an Android smartphone from 2015 has a better camera than many new 100€ webcams. If I had bought the used smartphone, the total cost for my setup would have been around 150€, including DroidCamX.